Stepper Motors with Arduino - Controlling Bipolar & Unipolar stepper motors
Февраль 10, 2018
Full Article with Code at https://dbot.ws/stepper
More projects at https://dronebotworkshop.com
Today we will be working with stepper motors, a versatile yet often misunderstood electromechanical component used in a variety of devices.
After examining how stepper motors work and what the difference is between a “Bipolar” and “Unipolar” stepper is I will show you how three methods of controlling a stepper motor with an Arduino:
1 — A common 28YBJ-48 Unipolar Stepper with a ULN2003 driver board. These inexpensive stepper and driver combinations are very common and are available on eBay, Amazon and probably in your local electronics store. I’ll show you two different ways to use these with two different Arduino libraries.
2 — A NEMA 17 Bipolar stepper motor with an L298N dual H-Bridge driver board. We’ve used the L298N driver board in another video to control a pair of brushed DC motors but it also makes a good driver for a bipolar stepper motor.
3 — The same NEMA 17 Bipolar stepper motor controlled by an A4988 stepper driver. This common driver board is used in many 3D printers and CNC machines and simplifies the control of one or several stepper motors with an Arduino.
I’ll also discuss concepts like microstepping and I will show you how to understand some of the many parameters that are included on stepper motor specification sheets.
If you’d like to jump ahead to a particular section in the video here is the table of contents:
Stepper Motor Theory — 1:34
Bipolar vs Unipolar Steppers — 4:21
Common Stepper Specifications — 8:18
NEMA motor sizes — 11:32
28YBJ-48 Unipolar Stepper with ULN2003 — 13:41
NEMA 17 Bipolar with L298N — 28:16
NEMA 17 Bipolar with A4988 — 36:41
As always you can get all of the code I use in this video by visiting the DroneBot Workshop website and looking at the article at https://dbot.ws/stepper. You’ll find code listings and hookup diagrams and well as a convenient ZIP file containing all of the Arduino sketches.
Hopefully this video will inspire you to start using stepper motors in your own designs. If you have any questions please let me know in the comments below.
Now let's get stepping!
6635 121
445,816 просмотров

You can learn Arduino in 15 minutes.
The ultimate Arduino tutorial for beginners. Learn how to choose an Arduino, dim LEDs, build a motor speed controller and more. Sponsored by Audible — Get a free 30 day trial & download one free title: http://www.audible.com/afrotechmods
Example UNO kit: http://amzn.to/2mRjqLa
Example UNO robot kit: http://www.amazon.com/exec/obidos/ASIN/B07KPZ8RSZ/afromods-20
Website: http://www.afrotechmods.com
Twitter: http://twitter.com/Afrotechmods
Facebook: http://www.facebook.com/Afrotechmods/
If you are feeling extra generous, bookmark this link and use it as your Amazon home page:
http://www.amazon.com/?_encoding=UTF8&camp=1789&creative=9325&linkCode=ur2&tag=afromods-20
If you do that, I get a percentage of everything you buy, and you don't have to spend an extra dime!
#Arduino #Science #Engineering
64888 1097

Build an Arduino EEPROM programmer
In this video, we'll use an Arduino Nano to make programming EEPROMs (e.g., 28C16) much easier. For more info on these EEPROMs, check out the previous video: https://youtu.be/BA12Z7gQ4P0
Support me on Patreon: https://www.patreon.com/beneater
All the code is available here: https://github.com/beneater/eeprom-programmer
Parts list for the programmer: — 1x Arduino Nano (or most any other kind) — 2x 74HC595 — 1x 28C16 EEPROM (should also work for 28C64 or 28C256)
5952 64
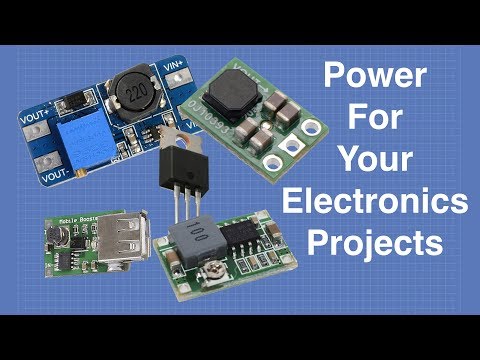
Power For Your Electronics Projects - Voltage Regulators and Converters
Full article at https://dbot.ws/pwrvolt
More info and projects at https://dronebotworkshop.com
Join the newsletter, and tell me what videos to make at https://dbot.ws/dbnews
Today we are going to look at the somewhat mundane but absolutely essential subject of supplying power for your electronic projects. Trust me, this stuff is important!
Electronic devices typically require either 5 or 3.3 volts, sometimes both. Other common voltage requirements include 6 and 12 volts for motors and displays. Some complex designs (ie. a robot) require several different supplies with different current capabilities.
When you build your latest robot or IoT device you’ll need to consider how you'll supply these voltages in the real world. On the workbench you can use a bench power supply if you have one, a USB adapter or even the USB port on a computer (just like with the Arduino).
But when your creation needs to exist on its own with a line-powered or battery power supply you’ll need to figure out how to get all of those voltages delivered to your components, preferably easily and inexpensively.
I have nine, yes nine methods of doing exactly that. Today I’ll show you a number of different voltage regulators and converters ranging from the classic 7805 3-pin voltage regulator to a tiny device that can supply a steady 5 volts even when your battery is about to die.
Check out the following Table of Contents to skip ahead to the power supply solution of your choice. Or just sit back and enjoy the show.
INTRO
Breadboard power supply module — 3:00
Power Supply Basics — 6:28
LINEAR REGULATORS
LM7805 — 5 Volt linear regulator — 11:42
LM317 — Variable linear regulator — 14:32
PSM-165 — 3.3 Volt linear regulator module — 17:52
AMS1117 — 5 Volt linear regulator module — 19:47
L4931CZ33-AP — 3.3 volt low voltage-drop regulator — 21:43
VOLTAGE CONVERTERS
Buck Converter Intro — 23:51
MINI-360 — Variable buck converter — 24:41
Boost Converter Intro — 26:46
PSM-205 — USB boost converter — 27:37
MT3608 — Variable boost converter — 29.07
Buck Boost Converter Intro — 31:06
S9V11F5 — 5 Volt buck boost converter — 33:06
That last module is the one I was referring to earlier, it really is an amazing device and is perfect for your battery powered projects.
As with all of my videos there is an article at https://dbot.ws/pwrvolt where you will find more details regarding all of the voltage regulators, buck converters, boost converters and buck boost converters mentioned here.
Now go power something up!
4236 68

Amazing Food Processing Machines That Are At Another Level 2
Amazing food processing machines that are at another level — most satisfying.
1. Dough ball machine — www.imsms.pl/en
2. Excalibur Bagel Machine — www.altuntastechnik.com
3. Egg breaker machine — essica.it/en
4. Cake line — bakon.com
5. Jam Filled Soft Biscuit Manufacturing Line — www.yixunmachines.com
6. Ball cutter for rock candy — www.loynds.com
7. High-speed slicer — www.kohlerindustries.com
8. Orange peeling machine — www.hlchinamachine.com
9. Sugar rolled cone baking machine — https://www.youtube.com/watch?v=PHnnXuU_F8Y, [email protected]
10. Ice cream machines — www.icegroup.pl
11. Cake Decorating Equipment — www.unifiller.com
12. Donut machine — www.jufeba.de
4037 725
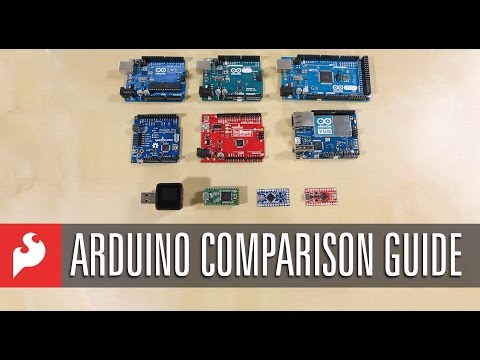
SparkFun Arduino Comparison Guide
Updated guide for 2017: https://www.youtube.com/watch?v=zJJkNJWWcIU
Products Featured in this Video:
Arduino Uno: https://www.sparkfun.com/products/11021
Arduino Uno SMD: https://www.sparkfun.com/products/11224
SparkFun RedBoard: https://www.sparkfun.com/products/12757
Arduino Pro 328 — 5V/16MHz: https://www.sparkfun.com/products/10915
Arduino Pro 328 — 3.3V/8MHz: https://www.sparkfun.com/products/10914
SparkFun FTDI Basic Breakout — 5V: https://www.sparkfun.com/products/9716
SparkFun FTDI Basic Breakout — 3.3V: https://www.sparkfun.com/products/9873
Arduino Pro Mini 328 — 5V/16MHz: https://www.sparkfun.com/products/11113
Arduino Pro Mini 328 — 3.3V/8MHz: https://www.sparkfun.com/products/11114
Pro Micro — 5V/16MHz: https://www.sparkfun.com/products/12640
Pro Micro — 3.3V/8MHz: https://www.sparkfun.com/products/12587
SparkFun MicroView — OLED Arduino Module: https://www.sparkfun.com/products/12923
SparkFun MicroView — USB Programmer: https://www.sparkfun.com/products/12924
Arduino Mega 2560: https://www.sparkfun.com/products/11061
Teensy 3.1: https://www.sparkfun.com/products/12646
Arduino Yun: https://www.sparkfun.com/products/12053
Thinking about getting started with Arduino but not sure where to start? Look no further! We've put together this handy guide to help you pick the right microcontroller for your project.
9301 220
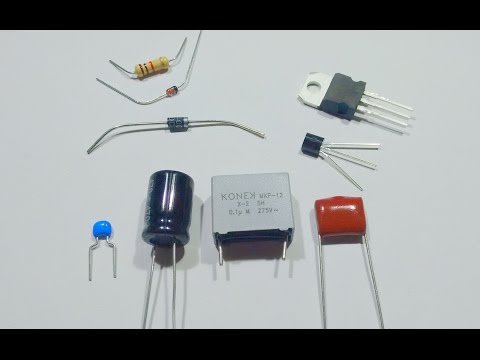
A simple guide to electronic components.
By request:- A basic guide to identifying components and their functions for those who are new to electronics. This is a work in progress, and I welcome feedback from you guys on whether I should break it down into more manageable chunks. I've kept the maths to a minimum, since it can be off-putting to someone just getting started in electronics.
The idea of this video is to slot in some more of the jigsaw pieces involved in learning electronics, when you start to recognise components, but aren't quite sure what they are or what they do.
It's tricky to squeeze even the basics into a single video, and I've just realised how long this one is (and why it took all night to upload).
If you enjoy my videos you can support the channel with a dollar for coffee, cookies and components at https://www.patreon.com/bigclive
50671 1321

Working principles of several stepper motors (bipolar, unipolar, reluctance and can-stack)
Thanks to d85iDE for proofreading the video script!
Table Of Contents:
00:05 Introduction
00:24 Bipolar motor, 2 poles, clockwise
05:59 Bipolar motor, 2 poles, counterclockwise
08:02 Bipolar motor, 6 poles, counterclockwise
09:21 Bipolar motor, 6 poles, clockwise
09:40 Bipolar motor, 6 poles, half stepping
13:24 Bipolar motor, 6 poles, 2 phase on excitation
14:28 Coil with center tap
16:00 Unipolar motor with center taps
18:13 Unipolar motor, half stepping
19:02 Variable reluctance motor, 2 poles
22:17 Variable reluctance motor, 4 poles
24:11 Variable reluctance motor, 4 poles, half stepping
25:43 Variable reluctance motor, 16 gear teeth
28:57 Variable reluctance motor, 16 gear teeth, half stepping
30:23 Hybrid stepper motor
32:21 Hybrid stepper motor, half stepping
33:14 Can-stack stepper motor
The project page:
http://www.homofaciens.de/technics-electric-motors-stepper-motor_en_navion.htm
993 40

How Arduino is open-sourcing imagination | Massimo Banzi
http://www.ted.com Massimo Banzi helped invent the Arduino, a tiny, easy-to-use open-source microcontroller that's inspired thousands of people around the world to make the coolest things they can imagine — from toys to satellite gear. Because, as he says, "You don't need anyone's permission to make something great."
TEDTalks is a daily video podcast of the best talks and performances from the TED Conference, where the world's leading thinkers and doers give the talk of their lives in 18 minutes. Featured speakers have included Al Gore on climate change, Philippe Starck on design, Jill Bolte Taylor on observing her own stroke, Nicholas Negroponte on One Laptop per Child, Jane Goodall on chimpanzees, Bill Gates on malaria and mosquitoes, Pattie Maes on the "Sixth Sense" wearable tech, and "Lost" producer JJ Abrams on the allure of mystery. TED stands for Technology, Entertainment, Design, and TEDTalks cover these topics as well as science, business, development and the arts. Closed captions and translated subtitles in a variety of languages are now available on TED.com, at http://www.ted.com/translate
If you have questions or comments about this or other TED videos, please go to http://support.ted.com
6032 65

NEMA 34 Stepper Motor High Speed Demo - 4000 RPM
USB-MC Motion controller: http://www.audiohms.com/en/cnc-electronics-products/motion-controllers-and-breakout-boards/motion-controllers/usb-mc-motion-controller
This demo video shows test of microstep driver MST-109 with Leadshine NEMA 34 stepper motor 86HS85 (4.9 A; 8.5 Nm — 1203 oz-in; 8 leads; dimensions 82 mm x 82 mm x 134 mm; weight 3.8 kg — 134 oz). Windings are connected in parallel.
Control with Motion Controller USB-MC and Microstep Stepper Motor Drive MST-109 with 1/16 microstep resolution selested and 6.9 A phase current. Supply voltage was 64 VDC.
Maximum revolution speed is 4000 RPM.
Motion Controller USB-MC is connected to PC with Win 7 64 bit OS via USB port. Control software is Mach3 demo.
417 23

Using Power MOSFETS with Arduino
Part of a series on transistors leading to building H-bridges.
http://www.bristolwatch.com/index.htm
850 36
