My Top 5 Arduino Displays
Февраль 23, 2018
I show my favorite displays to use with arduino, from simple and small monochrome displays to big color displays with touch screen. Sponsored by JLCPCB — $2 for PCBs & Free Shipping for First Order https://jlcpcb.com
Over the years I've tried many displays and I always return to only a few of them to use in my arduino projects. It can be confusing to choose the correct display to buy so on this video I talk about the best displays I've tried so far to use with arduino.
I made video tutorials for my top 5 displays:
1. OLED 0.96" I2C Tutorial: https://www.youtube.com/watch?v=PrIAnDZ9dp8
2. LCD Nokia 5110 Tutorial: https://www.youtube.com/watch?v=1ZvY_lb6BoU
3. TFT 1.8" ST7735 Tutorial: https://www.youtube.com/watch?v=NAyt5kQcn-A
4. TFT 2.4" ILI9341 Tutorial: https://www.youtube.com/watch?v=n13RQMNFDOA
5. Nextion Display Tutorial: https://www.youtube.com/playlist?list=PLwLq6c7iS_v8UXIJ5KEmX7pJK6CH3fnxF
Components: — OLED 0.96" I2C: https://amzn.to/2UNDCLO — Nokia 5110: https://amzn.to/2NXSrs9 — 1.8" TFT ST7735: https://amzn.to/2OgXjIs — 2.4" TFT ILI9341: https://amzn.to/2YZzkT6 — Nextion 3.5" Enhanced: https://amzn.to/2OgFYPL — Arduino nano: https://amzn.to/2Q4sA5h
Note: As an Amazon Associate I earn from qualifying purchases.
For the other displays that I show on the video, but that are not in my top 5, I don't have video tutorials but here I upload my example scketches that you can use to learn how to use them: — VGA Monitor: https://drive.google.com/open?id=1Az4gm82p-XFeU-RBabXhokpnOkEU5NnO — LED 7-Segment 4-Digits with TM1637 driver: https://drive.google.com/open?id=1zfZPrQDhAADuLkApR1EUzgiyT9NBpGPy — LCD 128x64 SPI with ST7920 driver: https://drive.google.com/open?id=1Ac4e2-EJJ-pbW10CL5MRi—vBeiHVhxE — LED 7-Segment 8-Digits with Max7219 driver: https://drive.google.com/open?id=1FQDnqsPol4gUf95a1MLCRw7s8WnV-OWL — LCD 16x2 with I2C adapter: https://drive.google.com/open?id=1CYMrW1XTxSLprikS3n5H-P06KFY2nlum — LED 8x8 Matrix with Max7219 driver: https://drive.google.com/open?id=1wfdpJyZIteI-wGeBBt5tnAVZ3QzEEgS4
Website: https://interlinkknight.wixsite.com/interlinkknight
Patreon: https://www.patreon.com/InterlinkKnight/
2050 45
88,754 просмотров

How to create a simple Touchscreen GUI || Arduino LCD & Touchscreen Tutorial
Only $2 for 10pcs PCBs (10cm*10cm): https://jlcpcb.com
Previous video: https://youtu.be/m-4sHRzexpQ
Multiplexing video: https://youtu.be/uQMUPhyoXoE
Facebook: https://www.facebook.com/greatscottlab
Twitter: https://twitter.com/GreatScottLab
Support me for more videos: https://www.patreon.com/GreatScott?ty=h
You can download my example code here: https://www.patreon.com/posts/20817428
You can get an 8-Bit Parallel TFT LCD here: (affiliate links)
Amazon.com: https://amzn.to/2vLx3yD
Ebay: http://rover.ebay.com/rover/1/711-53200-19255-0/1?icep_ff3=2&pub=5575101368&toolid=10001&campid=5337582279&customid=&icep_item=192163706724&ipn=psmain&icep_vectorid=229466&kwid=902099&mtid=824&kw=lg
Amazon.de: https://amzn.to/2BkQnb8
Websites which were shown in the video:
https://cdn-shop.adafruit.com/datasheets/ILI9341.pdf
https://github.com/adafruit/TFTLCD-Library
https://github.com/adafruit/Adafruit_TouchScreen
https://www.nxp.com/wcm_documents/techzones/microcontrollers-techzone/Presentations/graphics.lcd.technologies.pdf
https://www.sparkfun.com/datasheets/LCD/HOW DOES IT WORK.pdf
In this video I will show you how TFT LCDs and resistive touchscreens work and how we can utilize an Arduino in order to control them. At the end I will then show you how to create a simple GUI for an Arduino project which has a touchscreen as an input.
Thanks to JLCPCB for sponsoring this video
Visit https://jlcpcb.com to get professional PCBs for low prices
Music:
2011 Lookalike by Bartlebeats
11760 209

Best Quality Breadboard?
Are you having a bad time finding a good quality breadboard? I bought a bunch of brands and models to see which ones are worth buying. I also describe the characteristics you should focus when searching for a good quality breadboard.
Here's my list of recommended brands/models: — Busboard Prototype Systems BB830 https://amzn.to/2QsyY3C — Jameco Valuepro WBU-202-R https://amzn.to/2NLz8oe
Note: As an Amazon Associate I earn from qualifying purchases.
Here's my list of breadboards to avoid: — Any cheap no-brand breadboard from China — Adafruit Product ID 239 — Elegoo MB-102 — Miyako USA EIC-102 — Jameco Valuepro BB-102
Website: https://interlinkknight.wixsite.com/interlinkknight
Patreon: https://www.patreon.com/InterlinkKnight/
537 3

НОВЫЕ ПЛАТФОРМЫ И МОДУЛИ ДЛЯ РАБОТЫ С ARDUINO
Модули и контроллеры Ардуино на моем сайте: http://voltnik.ru/arduino/
1. Платформа NodeMCU на 1мб: http://ali.pub/2b8rhy на 4мб: http://ali.pub/2b8rne
2. Платформа Wemos ESP32 OLED: https://goo.gl/7BMAV7
3. Платформа Wemos D1 PRO MINI: http://ali.pub/2b8rzu резерв: http://ali.pub/2b8sa5
4. Модуль весов 1-20кг: http://ali.pub/2b8szt на 5кг: http://ali.pub/2b8t8k на 1кг: http://ali.pub/2b8taw
5. Сенсорные кнопки 10шт: http://ali.pub/2b8th4 резерв: http://ali.pub/2b8tia
6. Датчик цвета: http://ali.pub/2b8tq2 резерв: http://ali.pub/2b8tp3
7. Набор газоанализаторов 9шт: http://ali.pub/2b8tty по одному: http://ali.pub/2b8u2b углекислый газ CO2: http://ali.pub/2ba80x
8. Сенсорный экран LCD 3.2": http://ali.pub/2b8qgf резерв: http://ali.pub/2b8qiy
9. Полноприводный робот на Arduino: http://ali.pub/2b8sj3 резерв: http://ali.pub/2b8soq
10. Платформа M5Stack: http://ali.pub/2b8svc
Печатный выпуск на сайте http://voltnik.ru/10-arduino-modules/
статья для установки esp8266: https://geektimes.ru/post/271754/
инструкция для wemos плат esp32 и другие: https://github.com/espressif/arduino-esp32
♦♦♦♦♦♦♦♦♦♦♦♦♦♦♦♦♦♦♦♦♦♦♦♦
⇒ Скидка от 5% на все товары Алиэкспресс: https://goo.gl/kYbrbq
⇒ Видео о том как работает скидка: https://youtu.be/D959at2-ChY
⇒ Мобильное приложение EPN cashback: http://epngo.bz/cashback_install_app/5b2e0
⇒ Если вы хотите начать зарабатывать на Алиэкспресс: http://epngo.bz/epn_index/5b2e0
♦♦♦♦♦♦♦♦♦♦♦♦♦♦♦♦♦♦♦♦♦♦♦♦
⇒ Подключайте свой канал к партнерке Air: http://goo.gl/qheq3F
♦♦♦♦♦♦♦♦♦♦♦♦♦♦♦♦♦♦♦♦♦♦♦♦
✔ Группа ВК: http://vk.com/china_nay
✔ Сайт канала: http://voltnik.ru/
#voltnikArduino
8090 245

Comparing the Arduino UNO, Nano and Pro Mini - arduino-tutorials.net
In this episode I briefly compare the Arduino UNO, Nano and Pro Mini. Checkout my other Arduino video tutorials at https://arduino-tutorials.net
🇳🇱 Deze video is ook in het Nederlands beschikbaar op https://youtu.be/owiY2nng97Y
Compare all Arduino models in one table: https://www.arduino.cc/en/Products/Compare
CHAPTERS:
00:08 Introduction
00:27 Arduino Uno
01:18 Arduino Uno Shields
02:08 Arduino Nano
03:39 Arduino Pro Mini
05:37 Conclusion
COMPONENTS:
Arduino Uno V3 for 3.19 USD:
https://www.banggood.com/UNO-R3-ATmega328P-Development-Board-For-Arduino-No-Cable-p-964163.html?p=TS070424652668201809
Arduino Nano soldered for 3.19 USD:
https://www.banggood.com/ATmega328P-Arduino-Compatible-Nano-V3-Improved-Version-No-Cable-p-959231.html?p=TS070424652668201809
Arduino Pro Mini 5V / 16Mhz for 2.76 USD:
https://www.banggood.com/Wholesale-New-Ver-Pro-Mini-ATMEGA328-328p-5V-16MHz-Arduino-Compatible-Nano-Size-p-68534.html?p=TS070424652668201809
Arduino Pro Mini 3.3V / 8Mhz for 3.04 USD:
https://www.banggood.com/Pro-Mini-ATMEGA328P-3-3V-8M-Interactive-Media-Upgrade-Version-For-Arduino-p-1077691.html?p=TS070424652668201809
358 17

Homemade Electric Jet Engine Working Model (1:24 scale) Part 3
Long ago I built a model of a jet engine (scale 1:24) that I made with an electric motor that moves, besides the fan, a set of gears and a flywheel that spin in 16:1 ratio, which I took from a flywheel-driven toy car.
I showed that model on two videos:
Part 1: https://www.youtube.com/watch?v=QSCcjEU0OQ8
Part 2: https://www.youtube.com/watch?v=L47SIAXFj18
Several people asked me to show the internals of the starter mechanism and fuel control lever. I didn't show it before because the panel was glued together, and removing it would damage the panel. I now re-consider it and did remove it for this 3rd part video, and even though it did damage the panel, it's not too bad.
For more details about the jet engine model, go here: https://www.instructables.com/id/Electric-Working-Jet-Engine-Model/
If you like my model jet, you might also like my V8 Engine Working Model https://www.youtube.com/watch?v=B2LqtCjqjEU
FAQ
1. How much thrust does it make?
None. Is just a model/toy
2. Is just a fan, right?
Yes, is just a fan.
3. Why call it a jet engine if is a fan?
Is a model/toy of a turbofan jet engine. Is a representation of an airliner engine.
4. Any plans to put it on an RC airplane?
No, because it doesn't generate any thrust (by design).
5. Instructions on how to build it?
Here: https://www.instructables.com/id/Electric-Working-Jet-Engine-Model/
Website: https://interlinkknight.wixsite.com/interlinkknight
Patreon: https://www.patreon.com/InterlinkKnight/
1030 68
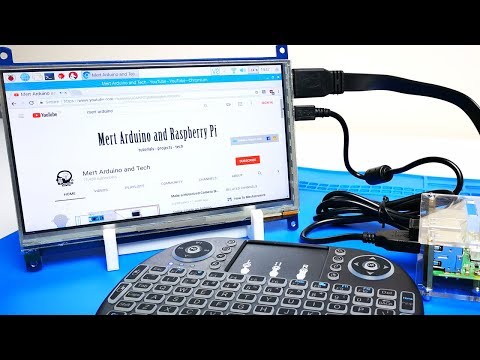
7 Inch 1024 x 600 HD Capacitive LCD Display | Touch Screen
New Video November 8, 2018: https://youtu.be/tl6A7EKicjo
The Last Few Days Save 40% More for Electronics: https://goo.gl/covX9J
Hi Everybody! Today I will review 7 inch 1024 by 600 HD LCD Capacitive Touch Screen. I bought this screen for my Raspberry Pi but this screen is compatible with many systems just like Windows. The screen comes with a ribbon style HDMI cable and USB power cable. I ordered this screen from Banggood. This product supports Windows. A new touch drive will be recognized by Windows and you can use the LCD as a human interface device. When working with Raspberry Pi, you should set the resolution of the LCD by yourself, or else the LCD screen will not work. To make the screen settings, Raspberry Pi must has an image. Just like Raspian. If it already has an image, insert the microSD card in your computer. Then open the config.txt file and copy the configuration lines found on the Banggood webpage into the config file. Save config.txt and insert the SDcard to your Raspberry Pi then power up. Your screen is now ready for use with Raspberry Pi! Thanks for watching. You can subscribe for support.
Geekcreit 7 Inch Touch Screen — https://goo.gl/4TNQpU
I8 Wireless Keyboard Gamepad — https://goo.gl/sLQgEP
Raspberry Pi 3 Model B — https://goo.gl/fA5rXZ
MIXZA Micro SD Card 16GB — https://goo.gl/wvHtEm
5V 2.5A Raspberry Pi Adapter — https://goo.gl/D4tgmS
Acrylic Case for Raspberry Pi 3 — https://goo.gl/RRnXrs
————————————————————————————————————
3D Model:
Display Stand — https://www.thingiverse.com/thing:1250389
JGAURORA A3S 3D Printer — https://goo.gl/o5pQcb
————————————————————————————————————
Studio Equipment:
Studio Lighting Softbox — https://goo.gl/PM3xTM
Adjustable SoftBox Tripod — https://goo.gl/j1N2UP
Zhiyun Smooth Q Gimbal — https://goo.gl/wcNqB8
Xiaomi Mi6 — https://goo.gl/EkiV7i
Magnetic Blue Mat — https://goo.gl/5j4Q7y
————————————————————————————————————
Social Media:
Subscribe to Channel — http://bit.ly/MertArduino
Facebook — http://bit.ly/MertArduinoFB
Instructables — http://bit.ly/Mertduino
329 28
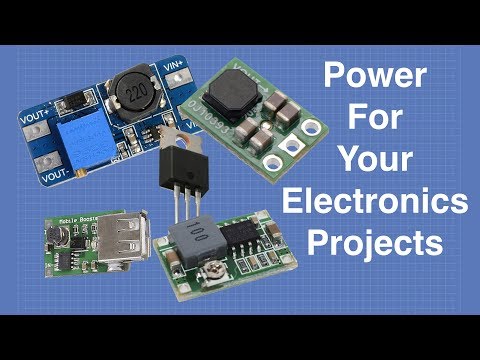
Power For Your Electronics Projects - Voltage Regulators and Converters
Full article at https://dbot.ws/pwrvolt
More info and projects at https://dronebotworkshop.com
Join the newsletter, and tell me what videos to make at https://dbot.ws/dbnews
Today we are going to look at the somewhat mundane but absolutely essential subject of supplying power for your electronic projects. Trust me, this stuff is important!
Electronic devices typically require either 5 or 3.3 volts, sometimes both. Other common voltage requirements include 6 and 12 volts for motors and displays. Some complex designs (ie. a robot) require several different supplies with different current capabilities.
When you build your latest robot or IoT device you’ll need to consider how you'll supply these voltages in the real world. On the workbench you can use a bench power supply if you have one, a USB adapter or even the USB port on a computer (just like with the Arduino).
But when your creation needs to exist on its own with a line-powered or battery power supply you’ll need to figure out how to get all of those voltages delivered to your components, preferably easily and inexpensively.
I have nine, yes nine methods of doing exactly that. Today I’ll show you a number of different voltage regulators and converters ranging from the classic 7805 3-pin voltage regulator to a tiny device that can supply a steady 5 volts even when your battery is about to die.
Check out the following Table of Contents to skip ahead to the power supply solution of your choice. Or just sit back and enjoy the show.
INTRO
Breadboard power supply module — 3:00
Power Supply Basics — 6:28
LINEAR REGULATORS
LM7805 — 5 Volt linear regulator — 11:42
LM317 — Variable linear regulator — 14:32
PSM-165 — 3.3 Volt linear regulator module — 17:52
AMS1117 — 5 Volt linear regulator module — 19:47
L4931CZ33-AP — 3.3 volt low voltage-drop regulator — 21:43
VOLTAGE CONVERTERS
Buck Converter Intro — 23:51
MINI-360 — Variable buck converter — 24:41
Boost Converter Intro — 26:46
PSM-205 — USB boost converter — 27:37
MT3608 — Variable boost converter — 29.07
Buck Boost Converter Intro — 31:06
S9V11F5 — 5 Volt buck boost converter — 33:06
That last module is the one I was referring to earlier, it really is an amazing device and is perfect for your battery powered projects.
As with all of my videos there is an article at https://dbot.ws/pwrvolt where you will find more details regarding all of the voltage regulators, buck converters, boost converters and buck boost converters mentioned here.
Now go power something up!
5085 83

Sensors - which one to use
$2 for 10PCBs (Not only for New User): https://jlcpcb.com
Here I show you a few examples with sensors. Below you have all the tutorials step by step with schematics, codes and libraries taht you need for each sensor.
Help my projects on Patreon : https://www.patreon.com/ELECTRONOOBS
my Q&A page: http://electronoobs.com/eng_preguntas.php
Facebook page: https://www.facebook.com/Electronoobs
Canal en Español: https://www.youtube.com/channel/UCL_QvUUeriC6q610RCXDlSQ
PRINTERS
——————————————————-
Alfawise U30 (150€): https://www.gearbest.com/3d-printers-3d-printer-kits/pp_009954647322.html?wid=1433363&lkid=18226130
Coupon: "GB3DU30"
Ender 3(155€ AMAZING): https://www.gearbest.com/3d-printers-3d-printer-kits/pp_1845899.html?wid=1433363&lkid=15361952
Creality CR20: https://www.gearbest.com/3d-printers-3d-printer-kits/pp_009553118595.html?wid=1433363&lkid=16797606
Coupon: "72HCR20"
Crealitu CR10 (328€): https://www.gearbest.com/3d-printers-3d-printer-kits/pp_441281.html?wid=1433363&lkid=18226147
Coupon: "GB3D1201"
Crealitu CR10S (372€): https://www.gearbest.com/3d-printers-3d-printer-kits/pp_796478.html?wid=1433363&lkid=15865423
Coupon: "GBCR10STY" or "GBCR10STY"
Creality CR10-mini (287€): https://www.gearbest.com/3d-printers-3d-printer-kits/pp_778274.html?wid=1654075&lkid=15865430
Tevo Tornado (289€): https://www.gearbest.com/3d-printers-3d-printer-kits/pp_725113.html?wid=1640583&lkid=15865403
Anycubic i3 MEGA (287€): https://www.gearbest.com/3d-printers-3d-printer-kits/pp_641323.html?wid=1433363&lkid=15865438
Tronxy X5SA (313€): https://www.gearbest.com/3d-printers-3d-printer-kits/pp_1837647.html?wid=1433363&lkid=15865457
Geetech E180 (235€): https://www.gearbest.com/3d-printers-3d-printer-kits/pp_1157480.html?wid=1433363&lkid=15865467
Anet A8 (180€): https://www.gearbest.com/3d-printers-3d-printer-kits/pp_337314.html?wid=1241548&lkid=15865474
Tevo Tarantula (180€): https://www.gearbest.com/3d-printers-3d-printer-kits/pp_628789.html?wid=1433363&lkid=15865486
FLsun-S (461€): https://www.gearbest.com/3d-printers-3d-printer-kits/pp_1604880.html?wid=1433363&lkid=15865494
SaprkMaker (217€): https://www.gearbest.com/3d-printers-3d-printer-kits/pp_009472956105.html?wid=1433363&lkid=15865496
—————————LINKS——————————
Color sensor: https://www.electronoobs.com/eng_arduino_tut70.php
Heart pulse sensor: https://www.electronoobs.com/eng_arduino_tut71.php
PIR sensor: https://www.electronoobs.com/eng_arduino_tut69.php
SHARP IR distance sensor: https://www.electronoobs.com/eng_arduino_tut72.php
VL53L0 laser distance sensor: https://www.electronoobs.com/eng_arduino_tut73.php
IR sensor: https://www.electronoobs.com/eng_arduino_tut74.php
LDR sensor: https://www.electronoobs.com/eng_arduino_tut75.php
IMU examples: https://www.electronoobs.com/eng_arduino_tut76.php
Magnetometer sensor: https://www.electronoobs.com/eng_arduino_tut77.php
Pressure sensor: https://www.electronoobs.com/eng_arduino_tut78.php
Gas sensor: https://www.electronoobs.com/eng_arduino_tut79.php
Ultrasonic distance sensor: https://www.electronoobs.com/eng_arduino_tut80.php
Current sensor: https://www.electronoobs.com/eng_arduino_tut81.php
Thermocouple sensor: http://www.electronoobs.com/eng_arduino_tut24.php
Hall sensor: https://www.electronoobs.com/eng_arduino_tut82.php
16 bits ADC: https://www.electronoobs.com/eng_arduino_tut83.php
—————————VIDEOS——————————
PIR tutorial: https://www.youtube.com/watch?v=uolzkPueCdU
Ultrasonic homemade sensor: https://www.youtube.com/watch?v=e_cyxoqvWe8&t=1s
Like share and subscribe to motivate me. Thank you
#sensors
#arduino
#examples
8000 158

Full HD Transparent OLED Display for Windows
From Exhibition at IMID Jeju, 2016.
4662 94
![Tope là #1 - Les projets Arduino les plus fous ! [FR / HD]](https://i.ytimg.com/vi/AtYFZg_S_Zc/hqdefault.jpg)
Tope là #1 - Les projets Arduino les plus fous ! [FR / HD]
Voici le premier épisode de Tope là! N'oublie pas le like et partage la vidéo sur tes réseaux sociaux!
Article sur l'Arduino que j'ai écris : https://furicate.blogspot.fr/2016/10/larduino-une-petite-revolution.html#more
Lien du blog : https://furicate.blogspot.fr
Merci à Paul sans qui je n'aurais jamais pu écrire cet article!
———————————————————————————————-
Le twitter de l'émission : http://twitter.com/Vazy_Tope_la
Mail de l'émission : [email protected]
———————————————————————————————-
Les sources :
#5 Grunting Racket par SEIYA KOBAYASHI : http://s5884.com/p/grunting-racket/
#4 Sorting Machine — Skittles and M&M's : vidéo original : https://www.youtube.com/watch?v=H7HTQai7Wwg
Plus de détails sur ce projet : http://beta.ivc.no/wiki/index.php/Skittles_M&M's_Sorting_Machine
#3 Plotclock : vidéo original : https://www.youtube.com/watch?v=iOLFP90DneY
Plus de détails sur ce projet : http://www.thingiverse.com/thing:248009
#2 HUGE Lego train coal terminal fully automated by Arduino : vidéo original : https://www.youtube.com/watch?v=MEekXRNztVI
#1 PONG PROJECT : vidéo original : https://www.youtube.com/watch?v=gTBcxr9KBuQ
Plus de détails sur ce projet : http://tablepongproject.com
———————————————————————————————-
MUSIQUE d'ambiance utilisé dans la vidéo (dans l'ordre) :
1] PONY — DELUXE
Support DELUXE :
Facebook : https://www.facebook.com/Deluxe.chinesemanrecords
Youtube : https://www.youtube.com/user/dlxrecords1
Twitter : https://twitter.com/deluxemoustache
2] Lexurus — Without You
3] Arc North — Oceanside
———————————————————————————————-
Groupe StudioPowerGold 2016 — tl
1773 708
