Make your own Boombox
Май 29, 2016
Previous video: https://youtu.be/kqCV-HGJc6A
Facebook: https://www.facebook.com/greatscottlab
Twitter: https://twitter.com/GreatScottLab
Support me for more videos: https://www.patreon.com/GreatScott?ty=h
More project information (schematic, parts list, .....) on Instructables: http://www.instructables.com/id/Make-Your-Own-Boombox
Parts list:
Amazon.com:
1x Car Radio: http://amzn.to/1TOnFPC
2x Lead Acid Battery: http://amzn.to/1WsXNfD
1x Charging Controller: http://amzn.to/1WsX1zl
4x DPDT Switch: http://amzn.to/1U57g6I
2x Speaker: http://amzn.to/1WsX9i3
1x Speaker Terminal: http://amzn.to/1U57Zon
1x AC Socket: http://amzn.to/1U56AOK
1x 12V 10A Power Supply: http://amzn.to/1TOo1Wq
1x Antenna: http://amzn.to/1TOopUO
Wago Terminals: http://amzn.to/1WsXtgJ
Ebay:
1x Car Radio: http://rover.ebay.com/rover/1/711-53200-19255-0/1?icep_ff3=2&pub=5575101368&toolid=10001&campid=5337582279&customid=&icep_item=281807306959&ipn=psmain&icep_vectorid=229466&kwid=902099&mtid=824&kw=lg
2x Lead Acid Battery: http://rover.ebay.com/rover/1/711-53200-19255-0/1?icep_ff3=2&pub=5575101368&toolid=10001&campid=5337582279&customid=&icep_item=281832515461&ipn=psmain&icep_vectorid=229466&kwid=902099&mtid=824&kw=lg
1x Charging Controller: http://rover.ebay.com/rover/1/711-53200-19255-0/1?icep_ff3=2&pub=5575101368&toolid=10001&campid=5337582279&customid=&icep_item=141963170051&ipn=psmain&icep_vectorid=229466&kwid=902099&mtid=824&kw=lg
4x DPDT Switch: http://rover.ebay.com/rover/1/711-53200-19255-0/1?icep_ff3=2&pub=5575101368&toolid=10001&campid=5337582279&customid=&icep_item=321872652113&ipn=psmain&icep_vectorid=229466&kwid=902099&mtid=824&kw=lg
2x Speaker: http://rover.ebay.com/rover/1/711-53200-19255-0/1?icep_ff3=2&pub=5575101368&toolid=10001&campid=5337582279&customid=&icep_item=181997978800&ipn=psmain&icep_vectorid=229466&kwid=902099&mtid=824&kw=lg
1x Speaker Terminal: http://rover.ebay.com/rover/1/711-53200-19255-0/1?icep_ff3=2&pub=5575101368&toolid=10001&campid=5337582279&customid=&icep_item=151796352174&ipn=psmain&icep_vectorid=229466&kwid=902099&mtid=824&kw=lg
1x AC Socket: http://rover.ebay.com/rover/1/711-53200-19255-0/1?icep_ff3=2&pub=5575101368&toolid=10001&campid=5337582279&customid=&icep_item=310568164458&ipn=psmain&icep_vectorid=229466&kwid=902099&mtid=824&kw=lg
1x 12V 10A Power Supply: http://rover.ebay.com/rover/1/711-53200-19255-0/1?icep_ff3=2&pub=5575101368&toolid=10001&campid=5337582279&customid=&icep_item=351299826035&ipn=psmain&icep_vectorid=229466&kwid=902099&mtid=824&kw=lg
1x Antenna: http://rover.ebay.com/rover/1/711-53200-19255-0/1?icep_ff3=2&pub=5575101368&toolid=10001&campid=5337582279&customid=&icep_item=391239832586&ipn=psmain&icep_vectorid=229466&kwid=902099&mtid=824&kw=lg
Wago Terminals: http://rover.ebay.com/rover/1/711-53200-19255-0/1?icep_ff3=2&pub=5575101368&toolid=10001&campid=5337582279&customid=&icep_item=310417612875&ipn=psmain&icep_vectorid=229466&kwid=902099&mtid=824&kw=lg
In this project I will show you how to create a Boombox that mainly consists of a car radio, salvaged speakers and two 12V lead acid batteries. This upgraded version is louder and lighter than my previous Boombox and can play its tunes up to 9 hours continuously.
Music:
2011 Lookalike by Bartlebeats
Killing Time, Kevin MacLeod (incompetech.com)
Ecstatic Wave by Jens Kiilstofte
https://machinimasound.com/music/ecstatic-wave
You want to support my videos?
You can browse and buy tools&materials from my Amazon Store. This way I get a small commission:
Amazon.de: http://astore.amazon.de/great043-21
Amazon.com:http://astore.amazon.com/gre09a-20
Amazon.co.uk: http://astore.amazon.co.uk/gre0b-21
Or you feel super generous and want to use this Amazon link as your Amazon home page. And do not worry, your purchases are all anonym and the prices are all the same:
Amazon.de:http://www.amazon.de/?_encoding=UTF8&camp=1638&creative=19454&linkCode=ur2&site-redirect=de&tag=great043-21&linkId=ORZEQZEOVJAFURCZ
Amazon.com:http://www.amazon.com/?_encoding=UTF8&camp=1789&creative=390957&linkCode=ur2&tag=gre09a-20&linkId=I5NDCEAVCD2OWM4S
41556 2113
4,518,869 просмотров
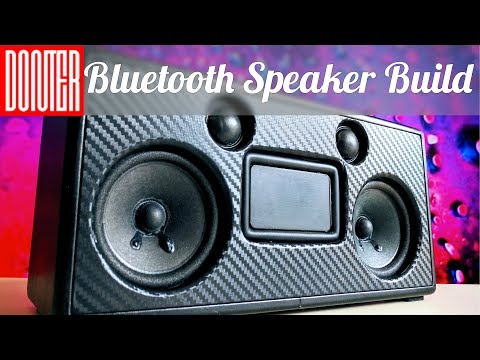
DIY Portable Bluetooth Speaker Build | Carbon and Vinyl
Check my Instructables page for the wiring diagram, parts list and more info! 👇👇👇
https://goo.gl/8aVRa3
COMPONENTS:
Speakers — https://ebay.to/2HlznAh
Amplifier Board — https://ebay.to/2HPbl1o
Bluetooth Receiver — https://ebay.to/2D32aKx
Crossovers — https://ebay.to/2qPGTNp
Tweeters — https://ebay.to/2LXqtPy
3.5mm Audio Jack — https://ebay.to/2Hg64Tq
Audio Cable — https://goo.gl/pNTreg
DC Power Jack — https://ebay.to/2JcP6Ss
White LED Power Push Button — https://ebay.to/2yXcjp2
Carbon Fiber Vinyl — https://ebay.to/2HPjN0H
Passive Radiator — https://ebay.to/2QtQEMc
BMS Board — https://ebay.to/2HQ6soU
12V Power Supply — https://ebay.to/2Je8K0u
Li-Ion cells — https://ebay.to/2K4f63Y
Push Button — https://ebay.to/2F4e1p3
Faux Leather — https://ebay.to/2qNcW0n
DC-DC Step Down Converter — https://ebay.to/2K5Uxno
Isolated Converter — https://ebay.to/2qNCSJs
Hi! My name is Donny and I'm pleased to share with You my first YouTube video of how to make my DIY Portable Bluetooth Speaker /Boombox build. Feel free to leave a comment below for any questions!
I designed the speaker on Sketchup. I chose to use MDF of 6mm thickness for the enclosure, since it is easy to cut and sand to achieve the desired shapes. For the control panel I used 3mm plywood, which I later wrapped with Carbon Fiber Vinyl. The box was also wrapped with Faux Leather Vinyl.
My main tool in this build was the Makita Jigsaw. Since I do not have access to a table saw, my cuts with the jigsaw had to be somewhat precise and accurate.
Using the semi-DIY drill and the jigsaw, I was able to drill holes for the speakers, control panel and the passive radiator.
After the cuts have been made, a piece of sandpaper was used to round over the corners and give the enclosure a nicer look and feel. A bigger size drill bit was used to countersink the holes on the back panel of the speaker.
I'd say this is the most time consuming and frustrating part of the build. Applying the Vinyls. I started with applying the Carbon Fiber vinyl to the control panel, front and back baffles. This material is somewhat resistant to scratches and cuts. It sticks well to a prepared surface and is easily stretched with the persuasion of a heat gun.
Since it was my first time using this vinyl, I did end up with torn vinyl around the tweeter holes, as you can see in the video. But a little dab with a black marker covered the mistakes. The vinyl really makes the subtle curves of the ports pop in sunlight, showing the fake weave in the vinyl.
Then I used contact cement to glue in the passive radiator and apply the faux leather vinyl. The tweeters are held in place with a healthy amount of hot glue. I covered the enclosure and the vinyl with contact glue, gave it a few minutes to dry and then stuck them together. The leather vinyl is stretchable, so I was able to form it around the corners and roundovers. After all that hassle I glued in the control panel.
Then there was a lot of soldering. Wiring the switches and ports, mounting them in, soldering the battery together. The electronics turned out to be working great, I was able to insert a small LED light in the control panel for the Bluetooth. The Power Button looks awesome on this speaker, it doesn't glow too bright, but the white light gives it that unique and eye-catching look.
To me, the best part about this speaker is the Power Button OFF action. When the speaker is turned off, the Power Button light slowly fades away, it does not shut down immediately. I guess the reason why it does so, is that the capacitors in the amplifier are slowly discharging in to the LED light in the button. You can see what I am talking about at the end of the build video.
Finally I was able to insert the front panel on to the enclosure and admire my project at its glory. I used a long piece of foam-like material for the gasket on the back panel to seal the speaker. Then I added my logo on the back side and screwed down the back panel.
I then stuck on a few pairs of adhesive pads on the bottom, gave the speaker a charge and it was now ready for some action!
————-
Music
ALIGN x Blookah — warm memories
————-
Make sure You subscribe to my channel for more content!
—————
Thank You so much for watching! I hope you enjoyed :)
— Donny
4563 287

DIY Portable Bluetooth + WiFi Speaker Build
Free build plans, laser-cut plans, wiring diagram and much more can be found on my post on Instructables! 👇👇 Please consider voting for my project on the contest! Thank You! ✌️
https://bit.ly/2GeUIO7
COMPONENTS:
Up2Stream WiFi Module — https://bit.ly/2Nac7sv
Bluetooth V4.0 Module — https://ebay.to/2Hi9pNO
YDA138-E Amplifier — https://ebay.to/2TAl40G
6 Ohm Woofers — https://ebay.to/2TdVrCF
6 Ohm Tweeters — https://ebay.to/2sZoNcF
75mm Passive Radiator (3 pcs) — https://ebay.to/2RmjE7T
2 Way Crossovers — https://ebay.to/2TiOsIP
18650 Cells — https://ebay.to/2Ti7Wx5
3S BMS — https://ebay.to/2DENnFB
12.6V Battery Charger — https://ebay.to/2D6jXAm
Ground Loop Isolator — https://ebay.to/2MAA1Nv
Wire Stripper — https://ebay.to/2G4x9av
You can find the full parts and tools list on my Instructables above ☝️
Hi everyone!👋
Thank you for checking out this portable Bluetooth WiFi speaker build I have come up with. As always I will have the laser-cut plans, the wiring diagram and the whole parts and tools list on my Instructables page. Make sure you check my Instructable page too for more details. Let's get started!
For this speaker I decided to try implementing not only Bluetooth 4.0 but also a WiFi module. Here I am using the Up2Stream WiFi module which is super easy to use and delivers great sound quality at a reasonable price. There is also an Aux input which when plugged in automatically disables the Bluetooth or WiFi input letting us make a simpler and cleaner looking speaker with less buttons and switches which is always pleasing to get rid of.
The speaker is powered by three Lithium Ion 18650 cells connected in series, resulting in 12.6 Volts total and a capacity of around 3Ah. The cells are being monitored by a Battery Management System (BMS) which I will show in depth of how to connect it to the cells. After testing I can confirm that these cells are able to provide the necessary power for around 6-8 hours depending on the volume.
For the amplifier I chose one of my favorite Class D amplifiers — the Yamaha YDA138-E. It delivers plenty of power in to the drivers with plenty of bass and clear highs. One of the best features of this amplifier is that there is absolutely no audible noise being projected when the speaker is not playing. I have tried many Class D amplifier and I can truly say that this one is top of the range in it's price point.
For the Bluetooth module I chose the KRC-86B Bluetooth 4.0 audio receiver. Nowadays there are many boards superior to this one but it still performs great, delivers unobstructed sound and connects instantly to the streaming device.
I have to say — I am happy the way this speaker has turned out. My apologies for the crappy sound test on the video but you will have to take my word for it — not only does it look decent but it sounds good too! I did make a few flaws here and there when building the speaker but hey — at least I learned something! And I truly hope you did too! Thank you so much for checking this project out, I hope I inspired you to build a speaker of your own. And if you are still hesitating — do it! It is super rewarding and the knowledge you get by making it is priceless. Not to mention the fun!
Thank you once again for tuning in to this project of mine and I will see you on the next one!
— Donny
Music:
Daäna — Little Animals (Trilingo Remix)
Capyac — Movement Swallows Us
2990 120

Mobiler Lautsprecher
37 2

Boombox Time Capsule
A look at a New-Old-Stock Boombox from the 80s/90s.
Available from eBay UK here: http://goo.gl/0yhCte........DETAILS OF MUSIC PLAYED IS LISTED BELOW (CLICK SHOW MORE)
Techmoan can be supported via http://patreon.com/techmoan
All music is from the youtube audio library.
https://www.youtube.com/audiolibrary/music
Long Way Home — Silent Partner https://www.youtube.com/audiolibrary_download?vid=4cd666995e0ced09
New on the Block — Silent Partner https://www.youtube.com/audiolibrary_download?vid=ef50dc9b19c42308
Smooth Ridin — Huma-Huma https://www.youtube.com/audiolibrary_download?vid=645a3813a8bed054
Saturday Groove — John Deley https://www.youtube.com/audiolibrary_download?vid=552a3435ea53c1f5
———AFFLIATED LINKS/ADVERTISING NOTICE———-
All links are Affiliated where possible.
When you click on links to various merchants posted here and make a purchase, this can result in me earning a commission. Affiliate programs and affiliations include, but are not limited to, the eBay Partner Network & Amazon.
I am a participant in the Amazon Services LLC Associates Program, an affiliate advertising program designed to provide a means for sites to earn advertising fees by advertising and linking to AMAZON Sites (including, but not limited to Amazon US/UK/DE/ES/FR/NL/IT/CAN)
12275 336

BIGGEST 6.5" Subwoofer Setup EVER!?! 20 SUNDOWN Subs w/ Sound System DEMO & 2 12" Ported Subwoofers
More insane car stereos and BASS setups! Today we've got Ronnie and Alan both coming in strong with their subwoofer installs, blasting songs at full tilt. Loaded up with 20 Sundown 6.5 inch subwoofers and a pair of EMF Audio 12" subs in a nice looking ported box. This video has a little bit of everything, so Thanks For Watching :)
Visit The Amp Lab's Webstore!
https://goo.gl/AETvEu
The Amp Lab Facebook Page
https://goo.gl/Ju6K29
Become a Patron to Automatically Enter GIVEAWAYS!
http://www.patreon.com/EXOcontralto
Follow Me Here:
http://instagram.com/EXOcontralto
http://www.patreon.com/EXOcontralto
http://www.facebook.com/EXOcontralto
http://www.youtube.com/user/EXOcontralto
Music By: AudioBlocks
http://www.audioblocks.com
Licensed under a Creative Commons Attribution license (https://creativecommons.org)
EXOcontralto
Bassheads Unite 2017
4350 232

Bluetooth 2.0 VS Bluetooth 4.0 (BLE) || Is an Upgrade worth it?
$2 for 10 PCBs & Free Shipping on First Order: https://jlcpcb.com
Support me for more videos: https://www.patreon.com/GreatScott
Previous video: https://youtu.be/USa3HFLnrlk
Facebook: https://www.facebook.com/greatscottlab
Twitter: https://twitter.com/GreatScottLab
Make your own Remote Bluetooth Firework Igniter: https://youtu.be/ScZfuQxoI_s
Electronic Basics #4: Arduino Bluetooth Android=Awesome: https://youtu.be/x3KAXjnP06o
Code used in this video can be downloaded here: https://www.patreon.com/posts/17759054
You can get the HC-05 and HM-10 board here: (affiliate link)
Amazon.com:
HC-05: https://amzn.to/2pDWMWI
HM-10: https://amzn.to/2G4arRd
Amazon.de:
HC-05: https://amzn.to/2I1qWtz
HM-10: https://amzn.to/2G9VzN9
Ebay:
HC-05: http://rover.ebay.com/rover/1/711-53200-19255-0/1?icep_ff3=2&pub=5575101368&toolid=10001&campid=5337582279&customid=&icep_item=232412681033&ipn=psmain&icep_vectorid=229466&kwid=902099&mtid=824&kw=lg
HM-10: http://rover.ebay.com/rover/1/711-53200-19255-0/1?icep_ff3=2&pub=5575101368&toolid=10001&campid=5337582279&customid=&icep_item=253082851414&ipn=psmain&icep_vectorid=229466&kwid=902099&mtid=824&kw=lg
Useful websites which were mentioned in the video:
https://github.com/yostane/arduino-at-09/blob/master/hm-10-datasheet.pdf
http://www.electronicaestudio.com/docs/istd016A.pdf
https://cdn.makezine.com/uploads/2014/03/hc_hc-05-user-instructions-bluetooth.pdf
http://www.martyncurrey.com/bluetooth-modules/
https://blog.yavilevich.com/2017/03/mlt-bt05-ble-module-a-clone-of-a-clone/
In this VS episode we will have a closer look at the most common Bluetooth boards for the Arduino. Along the way I will present you how easy it is to implement such a board in a Bluetooth project and whether it makes sense to use Bluetooth 4.0 (BLE) or whether we should stick to Bluetooth 2.0.
Thanks to JLCPCB for sponsoring this video
Visit https://jlcpcb.com to get professional PCBs for low prices
Music:
2011 Lookalike by Bartlebeats
Ecstatic Wave, Jens Kiilstofte
https://machinimasound.com/music
8266 164

DIY Electric Bike Conversion
Visit thestuffwebuild.com for build materials, instructions, and more: http://thestuffwebuild.com/projects/diy-electric-motorized-bicycle/
Speed: 20mph
Range: 10miles with 2x 10Ah 12v SLA batteries (seldom-assisted, i.e. only pedaling when accelerating from stops.)
9926 3092
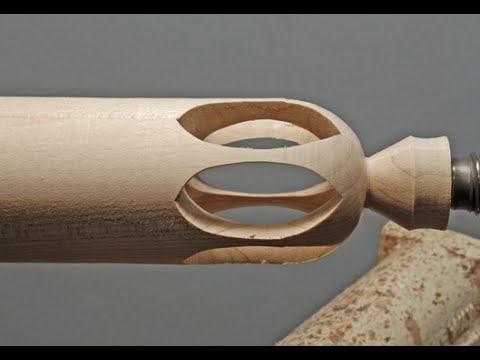
Build your own wood lathe in 30 minutes
SOME IDEAS, AND EXPERIMENTS CAN BE DANGEROUS. AND FOR THAT YOU DON'T RISK AND DAMAGE YOURSELF AND THE ENVIRONMENT, I COME TO HELP. I am a professional in my business with a lot of experience! EVERY VIDEO, EVEN THAT, IS COMPLETED WITH COMPLIANCE WITH ALL SAFETY MEASURES. ENJOY THE VIDEO, AND EAT THE SWEETS) The rest I do instead of you.
A WARNING:
This video is for demonstration and educational purposes only. Each demonstration presents risks and hazards that must be fully understood before attempting, and should be performed only by professionals. You use this video content at your own peril and risk. DO NOT REPEAT! FRIEND CHANNEL! VERY INTERESTING VIDEO IDEAS, EXPERIMENTS AND SELF-MODEL TOOLS! GO will support it, and subscribe to the channel!
https://www.instagram.com/zoomdiy/
https://www.youtube.com/channel/UCD0-L3SCnkQqJbwyaAZgJqw/featured
8270 1268

JP BUILDS A 2500 WATT PSI HYBRID MINI MONSTER!
SO NOW YOU KNOW WHY I HAD TO SMASH THE LAST ONE! LOL! HOPEFULLY YOU CAN LEARN SOMETHING FROM THIS VIDEO! BE SURE TO HIT UP FIX MYSPEAKER TO GET YOUR SPEAKER FIXED!
https://fixmyspeaker.com/service-request/
YOU CAN BUY ALL SUNDOWN AUDIO PRODUCTS AND MORE FROM ME HERE!
http://www.down4soundshop.com
BE SURE TO LIKE, SHARE, COMMENT AND SUBSCRIBE IF YOU ENJOY THE VIDEO =D
Follow me on facebook here — https://www.facebook.com/Thelifeofprice
iNSTAGRAM- THELIFEOFPRICE
https://www.down4sound.com
www.twitter.com/THELIFEOFPRICE
www.facebook.com/down4sound
A HUGE THANK YOU TO MY YOUTUBE CONTRIBUTOR WILLIAM BERG!!
8296 2252

How to Make a Vacuum Cleaner at home - Very Simple
How to Make a Vacuum Cleaner at home — Very Simple
In this video you will see how to make a vacuum cleaner at home in very simple way.
Things you need to make this Vacuum Cleaner —
Pringles Container
DC Motor
On/Off Switch
Lipo Battery 3.7V 500mah
Lipo Battery Connector
Compass
Bottle
Pen Knife
Cardboard
Paper Card
PVC Plastic Sheet
Aluminum Sheet
Hot Glue
Scissors
Soldering Iron
15573 1403
