E34 - Masks and Motion Tracking - Adobe Premiere Pro CC 2017
Февраль 19, 2017
This episode shows how to add masks to an object and animate them manually or through motion tracking.
223 6
28,022 просмотров
4 Awesome Ways To Use Masking In Premiere Pro
Get 100's of FREE Video Templates, Music, Footage and More at Motion Array: http://bit.ly/2ThVUnO
Check our our full article here:
https://motionarray.com/premiere-pro/how-to-use-adobe-premiere-masks-tutorial/
In this tutorial we look at how to mask in Premiere Pro. Masking in Premiere Pro is powerful and an essential part of any editor's tool kit. But you probably didn't realize all the different ways that you can use masking. Today we go over 4 ways to use masking to get the most out of your videos!
You can also check us out at: https://motionarray.com/
If you are upgrading from a free plan, please use this link:
https://motionarray.com/account/upgrade?discount=youtube
Facebook: https://www.facebook.com/motionarray/
Twitter: https://twitter.com/MotionArray
Instagram: https://www.instagram.com/motionarray/
Here on YouTube, check out the following:
After Effects Tutorials:
https://www.youtube.com/playlist?list=PLuz8v_brMXJayZXnzHZp20iYOHIVXG5uI
Premiere Pro Tutorials:
https://www.youtube.com/playlist?list=PLuz8v_brMXJaOnZmyppjsx5RfSkVbbfT7
Filmmaking Tutorials:
https://www.youtube.com/playlist?list=PLuz8v_brMXJYd38UDIHApKNzEXoexnrx0
Check out our After Effects Complete Basics Course:
https://www.youtube.com/playlist?list=PLuz8v_brMXJYOqE_1m3nEKD9JAhNglHKF
As well as our Premiere Pro Basics Course:
https://www.youtube.com/playlist?list=PLuz8v_brMXJbIAa0YtBIU75tQB8-zm3s4
#premierepro #premiereprotutorial
19016 163

Use track mattes for stunning visual styles in Adobe Premiere Pro
Animated track mattes are a quick way to add visual style to your videos. Premiere Pro's titles can be used to create original shapes and opacity making track mattes even more amazing.
Check out Rampant Design Tools animated mattes:
http://www.rampantdesigntools.com
Please support us on PayPal so we can continue to create the content you want! Use this link to donate direct to PayPal.
https://www.paypal.com/cgi-bin/webscr?cmd=_s-xclick&hosted_button_id=2RBRSP2N57PB8
Stay connected with VideoRevealed on Facebook:
https://www.facebook.com/VideoRevealed
Download your FREE trial of Adobe Creative Cloud
http://adobe.ly/1S3mZW3
1579 29

Color correct a walking person in Premiere Pro | Cinecom.net
Learn CINEMATOGRAPHY from Leading Professionals ► https://youtu.be/Mgi4IXheMAI
✅ Use "COLOR-50" and get 50% OFF ► https://www.cinecom.net/COLOR-50. Mask an object or a face, track it and perform a color correction.
This is a free lesson from our premium course: "Premiere Pro Lumetri: Color Correct like a Pro". A complete training to get you started with professional color correction and grading with the Lumetri tool set of Adobe Premiere Pro.
In lesson number 17 you'll learn how to mask the face of Kim, track her movement and perform a color correction to make her skin tones look better. We'll be using tools from Premiere Pro without any third party plugins.
Premiere Pro has a powerful masking and tracking tool. Combined with the Lumetri tools, we can add a great color correction.
✅ Follow this link and get 50% off ► https://www.cinecom.net/COLOR-50
✅ FROM THE VIDEO
Article/Project ► https://www.cinecom.net/tutorials/color-correct-moving-objects-in-premiere-pro
✅ OUR EQUIPMENT
My Custom GH5 Camera Rig
► https://www.cinecom.net/gear/custom-panasonic-gh5-camera-rig/
Cheap Green Key Equipment
► https://www.cinecom.net/gear/chroma-key-essentials/
All the Film Gear we use
► https://www.cinecom.net/gear
✅ LETS CONNECT!
Website ► http://cinecom.info/Website
Discord ► https://discord.gg/Cinecom
Twitter ►http://cinecom.info/Twitter
Instagram ► http://cinecom.info/Instagram
#Cinecom
1505 21
5 FAST & EASY VISUAL EFFECTS in Premiere Pro
Learn CINEMATOGRAPHY from Leading Professionals ► https://youtu.be/Mgi4IXheMAI
https://storyblocks.com/Cinecom — Create simple and fast visual effects in Premiere Pro. Use these tips and tricks to achieve easy, but professional Special effects for your next project.
Fake Handheld Camera Preset
► https://www.youtube.com/watch?v=1K0Nq2YB5BA
Read More
► https://www.cinecom.net/premiere-pro-tutorials/5-easy-and-fast-visual-effects/
More Creative Tuesday
► https://www.youtube.com/playlist?list=PLV0ZcSTi6tB4lRVC4vzyKRMVJRyPHcO6D
VideoBlocks
► https://storyblocks.com/Cinecom
✅ OUR EQUIPMENT
My Custom GH5 Camera Rig
► https://www.cinecom.net/gear/custom-panasonic-gh5-camera-rig/
Cheap Green Key Equipment
► https://www.cinecom.net/gear/chroma-key-essentials/
All the Film Gear we use
► https://www.cinecom.net/gear
✅ LETS CONNECT!
Instagram ► http://cinecom.info/Instagram
Discord ► https://discord.gg/Cinecom
#Cinecom #CreativeTuesday
60673 797

How to Attach Objects to Walls & Ground in Adobe After Effects CC! (3d Motion Track Videos Tutorial)
Get the latest version of After Effects here: http://bit.ly/2ekhRiF
Learn how to attach videos or any object compositions to the wall or ground in your footage in Adobe After Effects CC 2017 in this tutorial. We will be using the 3d Camera Motion Tracker tool along with track solid compositions to create our final result!
———————————————————————————————-
Instagram: https://www.instagram.com/JustinOdisho
Twitter: https://twitter.com/JustinOdisho
Website: https://justinodisho.com/
Become a Member: https://www.youtube.com/channel/UCy7DyWXJ0jghyMsUoOU6F7g/join
27491 260

The Complete COLOR GRADING Tutorial for Premiere Pro: CINEMATIC FILM LOOK | Cinecom.net
Learn CINEMATOGRAPHY from Leading Professionals ► https://youtu.be/Mgi4IXheMAI
http://cinecom.info/PremiumBeat2017 — From basic color corrections to color theory and advanced color grading. Learn how to get that cinematic film look in this complete tutorial for Adobe Premiere Pro.
Color grading or color correction isn't an easy process to learn. Apart from the technical difficulties, there are many creative choices that have to fit a certain color theory. In this tutorial video we show you the complete process for achieving that cinematic film look you'll see in Hollywood blockbusters. In this tutorial video we'll be using Adobe Premiere Pro Lumetri.
This tutorial covers the grading process in 3 stages:
1. First we start by setting the correct exposure and contract. This process is considered as color correction. You can follow this link to learn the difference between color correction and color grading.
2. Next the color grading tasks come in place. We push specific colors in the shadows, mid-tones and highlights to achieve a look & feel.
3. Finally extra elements are added like flares or color shapes. We also mask specific areas in the shot, such as skin tones, to make them pop and draw attention to it.
*GH4/GH5 V-LOG*
You might have heard about log camera profiles? We're shooting with the GH4 that is able to capture with it's V-LOG profile. It's basically a very flat picture style that doesn't look good. But it contains a lot of information, making it great for color grading. Log profiles utilize the camera sensor in the best way, giving as much dynamic range as possible. Many DSLR cameras have this ability. The Sony series have their slog2 and slog3 and Panasonic their V-LOG. Canon cameras on the other hand don't have this build it, but there're third party picture styles like CineStyle which do a great job!
*Lumetri*
Adobe Premiere Pro now has a powerful color correction tool named Lumetri. These tools where integraded from Adobe Speedgrade, which hasn't been updated since.
Lumetri isn't the most advanced tool, but it definately has all the controls we need to perform color grading tasks for smaller project.
*Color Theory*
This is the theory of mixing different colors together to create a specific look or mood. In this tutorial I talk about color contrast, which refers to complementary colors. But there're many other techniques such as monochromatic, triangle colors, compounds and more. A great tool to help you create certain schemes is Adobe Color.
*Film Look*
As mentioned in the tutorial, there's contrast and film contrast. Same goes for the exposure of your shot. It comes down to making sure you don't have any underexposed or overexposed areas. This also means you have to be careful in your color grading/correction. When adding more contrast, it's important that you preserve the details in your shadows and highlights and don't over/underexpose anything. This is probably the most important part of a cinematic film look.
*Advanced Color Grading*
What really makes your shots look epic is by working on specific areas. It's pretty time consuming, but it definitely takes your video to the next level. By creating masks in Premiere Pro and tracking those you can add contrast, temperature, tint and more to those places. This makes your subject pop out and draw attention to it. Other possible techniques are adding warm flares or cold vignettes in your shots. These techniques work the same and are shown in the tutorial video.
✅ FROM THE VIDEO
Article ► https://www.cinecom.net/premiere-pro-tutorials/complete-color-grading-tutorial-cinematic-film-look
✅ OUR EQUIPMENT
My Custom GH5 Camera Rig
► https://www.cinecom.net/gear/custom-panasonic-gh5-camera-rig/
Cheap Green Key Equipment
► https://www.cinecom.net/gear/chroma-key-essentials/
All the Film Gear we use
► https://www.cinecom.net/gear
✅ LETS CONNECT!
Instagram ► http://cinecom.info/Instagram
Discord ► https://discord.gg/Cinecom
#Cinecom
23112 181
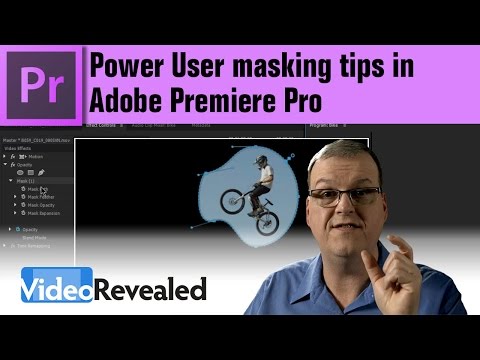
Power User masking tips in Adobe Premiere Pro
The Masking Tools are very powerful in Premier Pro, but they can easily be misunderstood. Follow these simple steps to make sure you get the best use of this tool.
For detailed information on rotoscoping, check out Mary Poplin and Mocha!
https://vimeo.com/114850269
Thanks to Curtis Pair for the new footage.
Please support us on PayPal so we can continue to create the content you want! Use this link to donate direct to PayPal.
https://www.paypal.com/cgi-bin/webscr?cmd=_s-xclick&hosted_button_id=2RBRSP2N57PB8
Stay connected with VideoRevealed on Facebook:
https://www.facebook.com/VideoRevealed
Download your FREE trial of Adobe Creative Cloud
http://adobe.ly/1S3mZW3
945 45
How to CLONE yourself!!
Ever wondered how to multiply yourself in photoshop or premiere pro? Learn how to clone yourself in video and photos with this tutorial!
NEW! Lightroom PRESET PACK: https://sellfy.com/p/QjNY/ — Edit your photos with 15 brand new presets!
Colour Graded with my PM LUTS Pack (presets for your video/photos! Easy to use!) : https://sellfy.com/p/EaHg/
The Music I use: https://goo.gl/IMZC9A — AMAZING for YouTubers!!
What's up everyone! Today we're learning a quirky little technique on how to CLONE yourself in videos and photos. It's actually pretty easy to do and you can be pretty creative/clever with it! I hope you guys enjoy the video and get to thinking on how YOU can start using this in your own work! :) See ya!
THE GEAR I USE:
My Super Awesome Tactical Camera Bag : http://amzn.to/2m8jnaT
My MAIN Camera — http://amzn.to/2kdu35o
My Second Backup Camera — http://amzn.to/2r29gGg
My FAVOURITE Lens Ever — http://amzn.to/2kQNK4U
The Lens I am currently using right for EVERYTHING — http://amzn.to/2r2BssE
The Magic Canon Lens of Life — http://amzn.to/2kXF9Qm
The Mic I use — http://amzn.to/2l23rrZ
The Boom Mic I use for Crispy Audio : http://amzn.to/2t1MqyX
My Drone — http://amzn.to/2kdE3M7
My Bigger Drone — http://amzn.to/2r2czgx
The stabilizer I use with iPhone : http://amzn.to/2kWhajI
My Slider — http://amzn.to/2sKyaeS
The BEST monopod — http://amzn.to/2lOPnn3
GoPro HERO 5 — http://amzn.to/2l1Nhit
FOLLOW ME:
Instagram: https://www.instagram.com/petermckinnon/
Twitter: https://twitter.com/petermckinnon
Facebook: https://www.facebook.com/petermckinnonphoto
Website: http://www.petermckinnon.com
84084 691

E35 - MAKE AN INTRO - Adobe Premiere Pro CC 2017
How to make a professional intro for a YouTube, Podcast, or Webseries.
198 7

Premiere Pro object removal with Opacity Masks (Garbage Mattes)
If you're used to using Garbage Mattes to draw masks around objects in video, then you might find Opacity Masks easier to use. Every clip comes with its own Opacity Mask and you can add as many masks as you need and invert them when you need to.
An added bonus is the ability to track the mask with moving objects.
Check out Power User masking tips!
https://www.youtube.com/watch?v=TrFaxPLvxFk
Please support us on PayPal so we can continue to create the content you want! Use this link to donate direct to PayPal.
https://www.paypal.com/cgi-bin/webscr?cmd=_s-xclick&hosted_button_id=2RBRSP2N57PB8
Stay connected with VideoRevealed on Facebook:
https://www.facebook.com/VideoRevealed
Download your FREE trial of Adobe Creative Cloud
http://adobe.ly/1S3mZW3
3049 103
